
Today I make light up cactus card for beginners using Chibitronics and Sizzix cactus die.

And this card has a replaceable battery box.

"Mariko Brown bold thank you"

What you need to make a light up card is like this.
"Chibitronics Pink, Orange, and Green LED Sticker Pack"
"Chibitronics Red, Yellow, and Blue LED Sticker Pack"
"3V coin cell battery (CR2016)"
"5mm wide Copper tape"
"Chibitronics Pink, Orange, and Green LED Sticker Pack"
"Chibitronics Red, Yellow, and Blue LED Sticker Pack"
"3V coin cell battery (CR2016)"
"5mm wide Copper tape"

I will make the parts referring to the picture below.

- 5.5 x 8.5 inch light brown cardstock
- 4 x 5.25 inch white cardstock for circuit
- vellum paper
- 1 x 1.5 inch four cardboards for the battery box
- 1 x 2 inch switch part
- 1 x 1 inch white cardstock for the lid of battery box
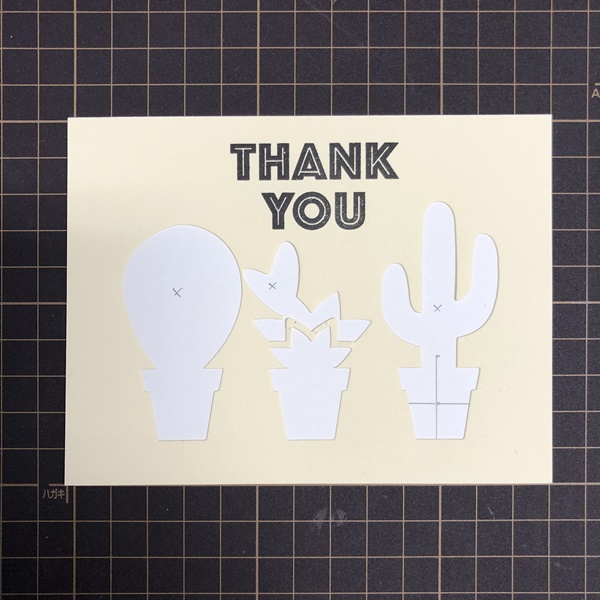
- Die cut cream cardstock with flower pot, cactus and heart dies and stamp the sentiment onto the cream cardstock.
- three flower pot parts and three cactus parts
Put the cream
cardstock on white cardstock and mark the lights and switch.
Mark the position
of the Chibitronics.

The “+” side of the Chibitronics needs to connect to the “+” side of the battery.
Adhere the copper
tape on the drawing path.

Adhere the green
and red Chibitronics on the mark.

Place the battery
in the switch with the positive side up. Adhere copper tape
on the Chibitronics to reinforce.

Make the battery
box.
Place the battery onto the cardboard, and draw the outline with a
pencil.

Glue each of four
cardboards together and glue the lid on the
battery box.

Make cardboard and
battery the same thickness.

Adhere vellum paper
on the back of the cover panel.

Adhere the die cut
parts on the cover panel.

Put the 3mm thick
foam tape around the card base.

Adjust so that the
thickness of the foam tape around the switch will be thicker than the thickness
of the battery.
Adhere the cover
panel on the card base.

Put the
double-sided tape on the back of the card base.

Adhere the finished
parts on two folded light brown cardstock.

Looking from the side, it is like this.

Stamp the sentiment
on the washi tape using StazOn Jet Black ink.
I'm using this stamp.
"Heffy Doodle Interactively Yours Stamp Set"
I'm using this stamp.
"Heffy Doodle Interactively Yours Stamp Set"

Put 3 mm wide washi
tape so that the battery box will not fall.

I finished it!

You can enjoy a long
time by replacing the batteries.

Be sure to check out the whole video tutorial for more details.
Thank you for
stopping by!


0 コメント:
コメントを投稿